ASP.Net Core .net 6 Demo Authentication Project using local Casdoor Docker Container on Windows Subsystem for Linux
I wanted to create a demo application with kind of real world authentication that I can easily adopt in projects.
This was not so easy as I thought.
1st: I wanted an identity provider that offers OAuth2.
2nd: I wanted the identity provider on my own machine or at least within my infrastructure.
3rd: I wanted a setup that I can describe to reproduce it.
Here is the result. - I work on Windows 11. It should work with Windows 10 too. - I use Visual Studio 2022.
Part 1: Preparation
Install Windows Subsystem for Linux version 2:
https://docs.microsoft.com/en-us/windows/wsl/install
Install Docker Desktop for Windows
https://docs.docker.com/desktop/windows/install/
Ensure you enabled WSL2 support in Docker!
Part 2: Setup
I need Casdoor as identity provider. It’s open source:
Pull the latest “all-in-one” Docker image of Casdoor.
docker pull casbin/casdoor-all-in-oneNow you create the container…
docker run -d -p 8000:8000 --name casdoor -v ./casdoor-data:/var/lib/mysql casbin/casdoor-all-in-oneThree comments on that:
- The Casdoor portal on your machine can be accessed using http://localhost:8000. If you need another port that change “8000:8000” to something else like “9000:8000”. The second port is internally used inside the Docker container. Do not change that. The first port is the published one on your machine.
- Casdoor is an identity provider. You will need to create identities in it. Of course you do not want to do that again and again. Therefore it’s a good idea to put the data of the Casdoor container into Docker volume. If you later recreate the container the volume will remain on disk.
- You ask: “Where is the Docker volume located on disk on WSL 2”? Good question! WSL creates a hidden mount point (?) that you can access on Windows by accessing
\\wsl$in the Explorer. Then you can navigate to the correct folder that contains the volume of Casdor:\\wsl$\docker-desktop-data\version-pack-data\community\docker\volumes\casdoor-data
Now you can open Casdoor:
The default login is: username “admin” with password “123” (without "")
Now … create some users.
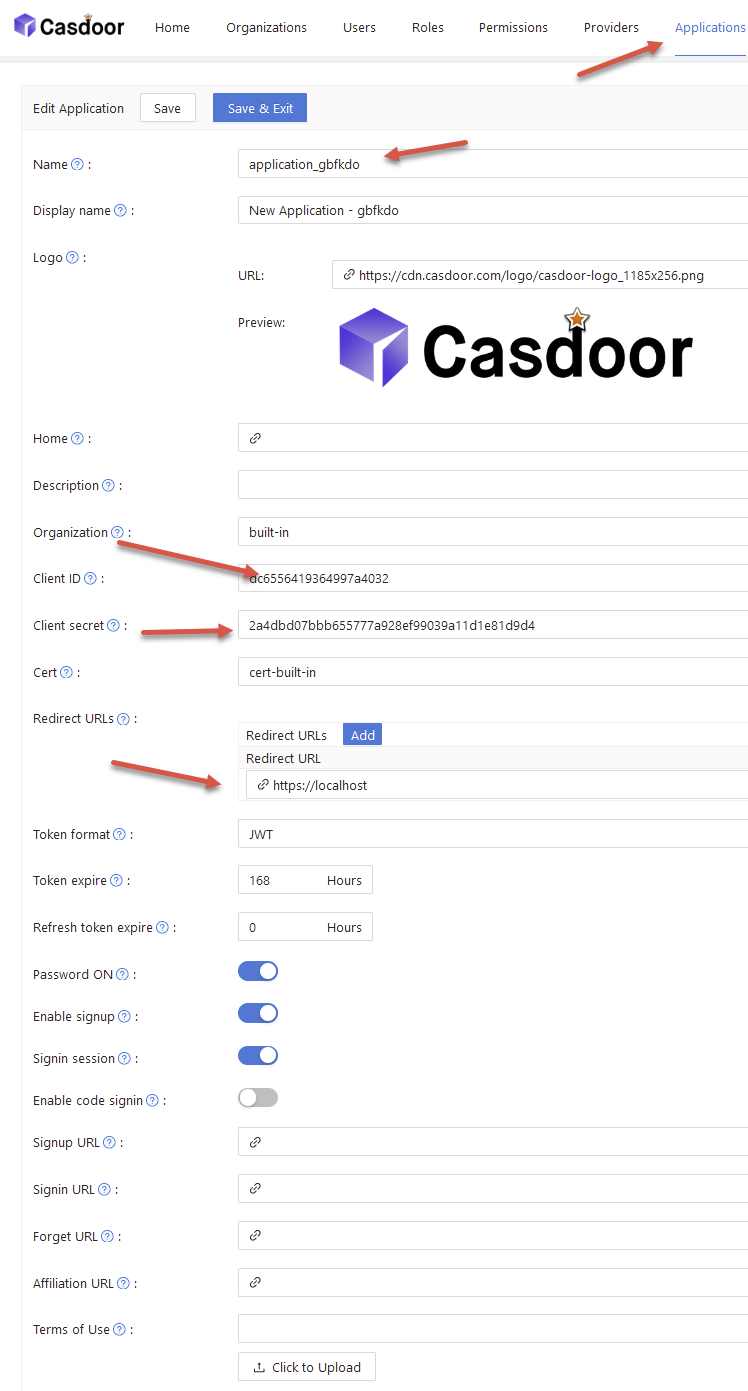
Then… create an application:
Part 3: The code
Now clone my github project:
https://github.com/ikarstein/com.kenaro.public.OAuth2Demo.Casdoor
Open the solution in Visual Studio 2022. Run it.
It will open a browser and looks like this:
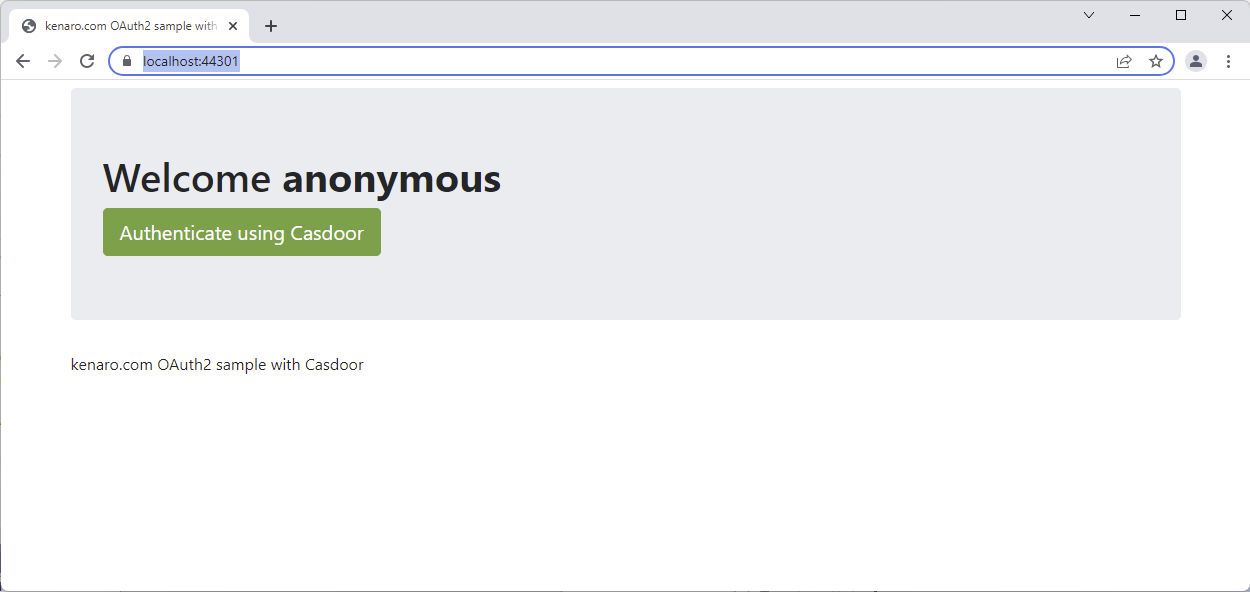
Click “Authenticate using Casdoor”
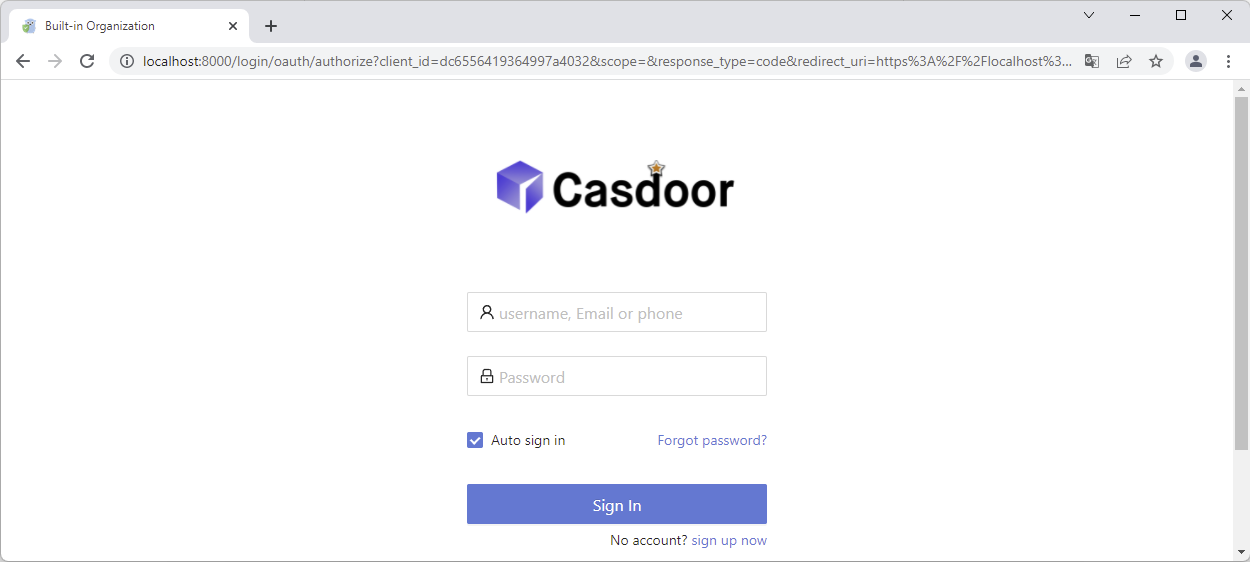
Authenticate…
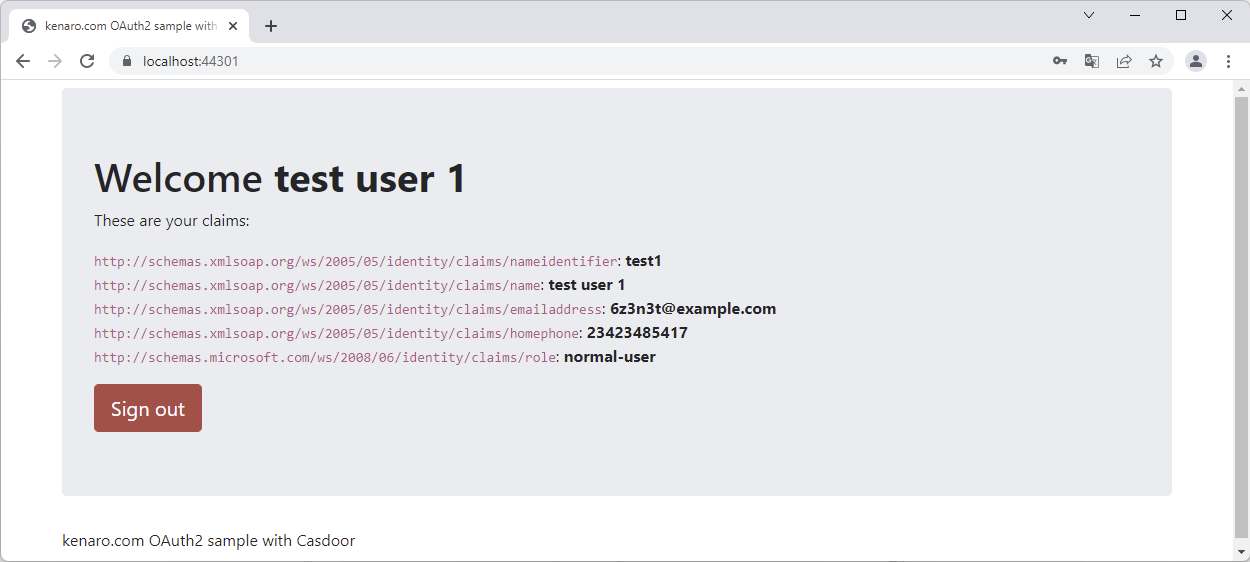
Thats it.
The magic happens in “Startup.cs”
.AddOAuth("casdoor", "Casdoor", options =>
        {
            options.AuthorizationEndpoint = "http://localhost:8000/login/oauth/authorize";
            options.TokenEndpoint = "http://localhost:8000/api/login/oauth/access_token";
            options.UserInformationEndpoint = "http://localhost:8000/api/userinfo";
            options.ClientId = "dc6556419364997a4032";
            options.ClientSecret = "2a4dbd07bbb655777a928ef99039a11d1e81d9d4";
            options.CallbackPath = "/signin-casdoor";
            options.ClaimsIssuer = "iss";
            options.SaveTokens = true;
            options.ClaimActions.MapJsonKey(ClaimTypes.NameIdentifier, "name");
            options.ClaimActions.MapJsonSubKey(ClaimTypes.Gender, "data", "gender");
            options.ClaimActions.MapJsonSubKey(ClaimTypes.Name, "data", "displayName");
            options.ClaimActions.MapJsonSubKey(ClaimTypes.Email, "data", "email");
            options.ClaimActions.MapJsonSubKey(ClaimTypes.HomePhone, "data", "phone");
            options.ClaimActions.MapJsonSubKey(ClaimTypes.Locality, "data", "location");
            options.ClaimActions.MapJsonSubKey(ClaimTypes.Webpage, "data", "homepage");
            options.ClaimActions.MapJsonSubKey(ClaimTypes.Role, "data", "type");

            options.Events.OnCreatingTicket = async creatingTicketContext =>
            {
                var token = creatingTicketContext.Properties?.GetString(".Token.access_token");

                using var request = new HttpRequestMessage(HttpMethod.Get, "http://localhost:8000/api/get-account");
                request.Headers.Accept.Add(new System.Net.Http.Headers.MediaTypeWithQualityHeaderValue("application/json"));
                request.Headers.Authorization = new System.Net.Http.Headers.AuthenticationHeaderValue("Bearer", token);

                using var response = await creatingTicketContext.Backchannel.SendAsync(request, HttpCompletionOption.ResponseHeadersRead, creatingTicketContext.HttpContext.RequestAborted);
                if (!response.IsSuccessStatusCode)
                {
                    throw new HttpRequestException("An error occurred while retrieving the user profile from Authentik.");
                }

                var userInfo = await response.Content.ReadAsStringAsync(creatingTicketContext.HttpContext.RequestAborted);
                using var jsonDoc = JsonDocument.Parse(userInfo);

                creatingTicketContext.RunClaimActions(jsonDoc.RootElement);
            };
        });
I took a while to figure out how to configure the OAuth2 provider.