Walkthrough: Creating a simple Sequential Workflow with a custom Task Form in SharePoint 2010 using Visual Studio 2010 (Part 2 of 2)
In this walkthrough I want to show you how to create a Sequential Workflow with Visual Studio 2010 for use in SharePoint 2010. – I will show how to create a custom Task Form for interaction with users. The Task form will be a native SharePoint list form. No InfoPath. There are many InfoPath samples out there but they cannot be used on a SharePoint Foundation 2010 platform. But workflows can be used on SharePoint Foundation 2010 too!
To reproduce the following steps you need to create a SharePoint site. – In the walkthrough I’ll use a Site Collection located at “http://sharepoint.local/sites/workflow”.
This blog post is part 2 of 2. It describes the steps 16 to 27. Read part 1 here: https://blog.kenaro.com/2011/03/30/walkthrough-creating-a-simple-sequential-workflow-with-a-custom-task-form-in-sharepoint-2010-using-visual-studio-2010-part-1-of-2/
You can download – and help to develop – the whole demo project source code at Codeplex: http://spworkflowdemo.codeplex.com/
(If you need assistance for the deployment process because of deployment errors please see this third post of this series: https://blog.kenaro.com/2011/04/22/walkthrough-creating-a-simple-sequential-workflow-with-a-custom-task-form-in-sharepoint-2010-using-visual-studio-2010-part-3-of-21/)
Let’s start (again)…
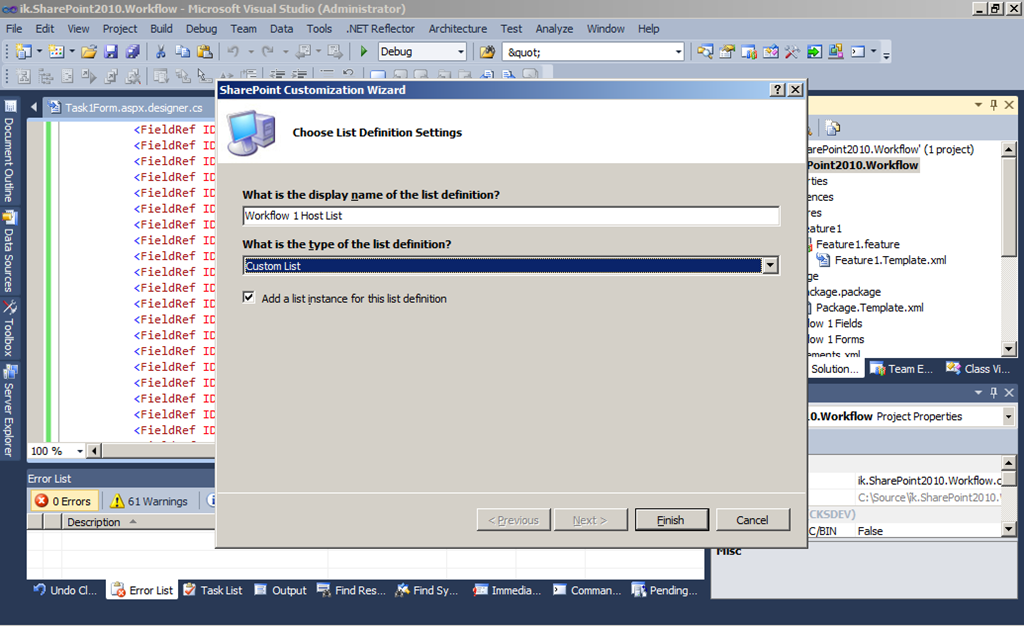
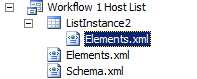
16. Now we need to add a list that we use to connect a workflow with. We create a “List Definition” project item named “Workflow 1 Host List”.
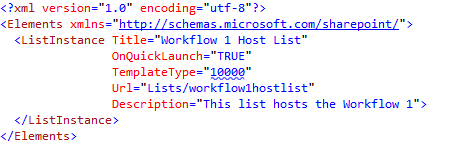
We change the “Elements.xml” file of the List Instance project item.
We change the Title, URL and Description.

17. Deploy the project.
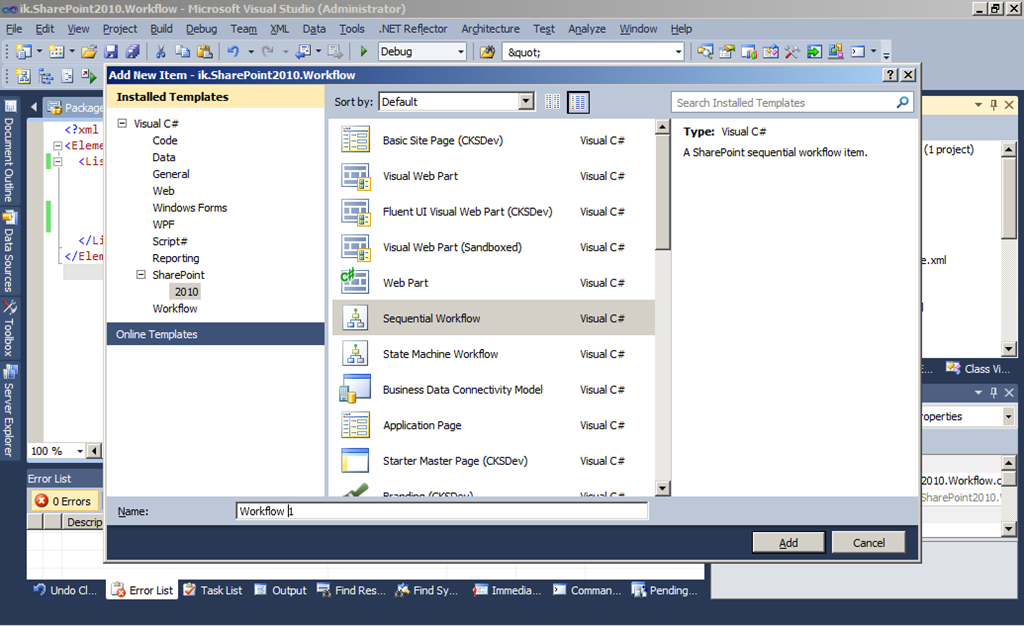
18. Now we start creating a Sequential Workflow.
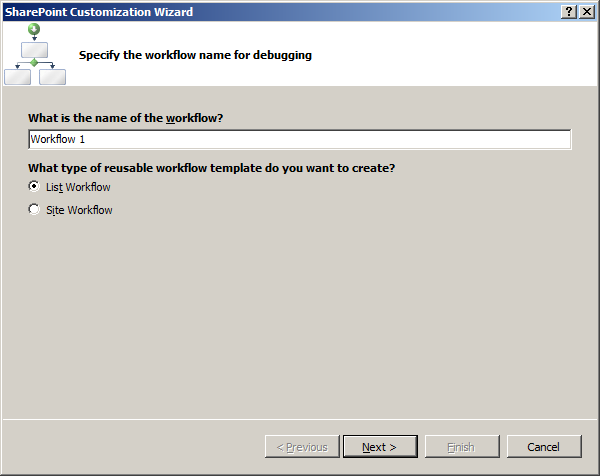
Create a “Sequential Workflow” project item named “Workflow 1”.
Create the workflow as “List Workflow”.
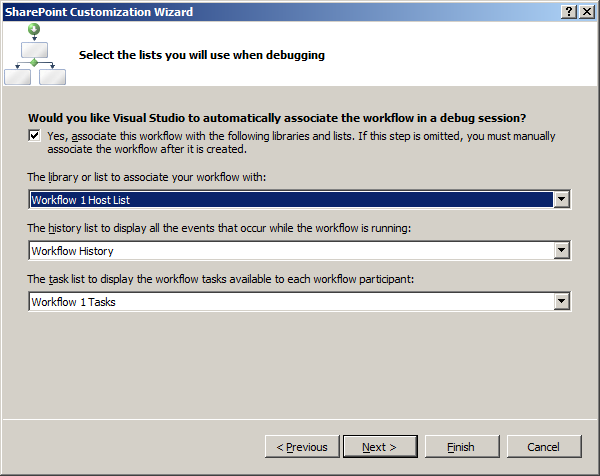
You will see all the lists we created in the previous steps. Remember: You have to (successfully) deploy the project before you can use the lists that will be created during deployment. – Without previous deployment the wizard may fail before you see the following dialog page.
In the first dropdown list choose “Workflow 1 Host List”. All other lists should be selected automatically because there is only one usable list of every needed type.
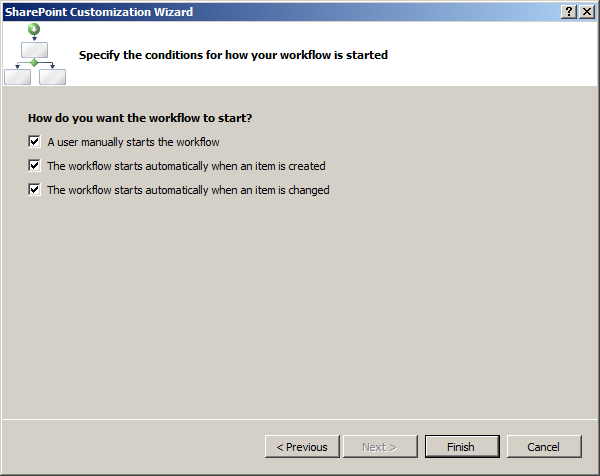
Select all “Workflow start” options: “Manually”, “Item Created”, “Item Updated”.
You get:
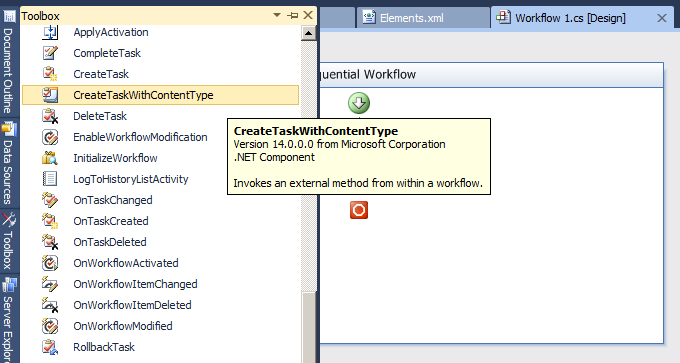
19. We will add a “Create Task With Content Type” workflow activity that will use our “Workflow 1 Task 1” we created in the steps 1 to 15 (blog post “part 1”).
Open the “Toolbox” pane and drag “CreateTaskWithContentType” into the Workflow Designer.
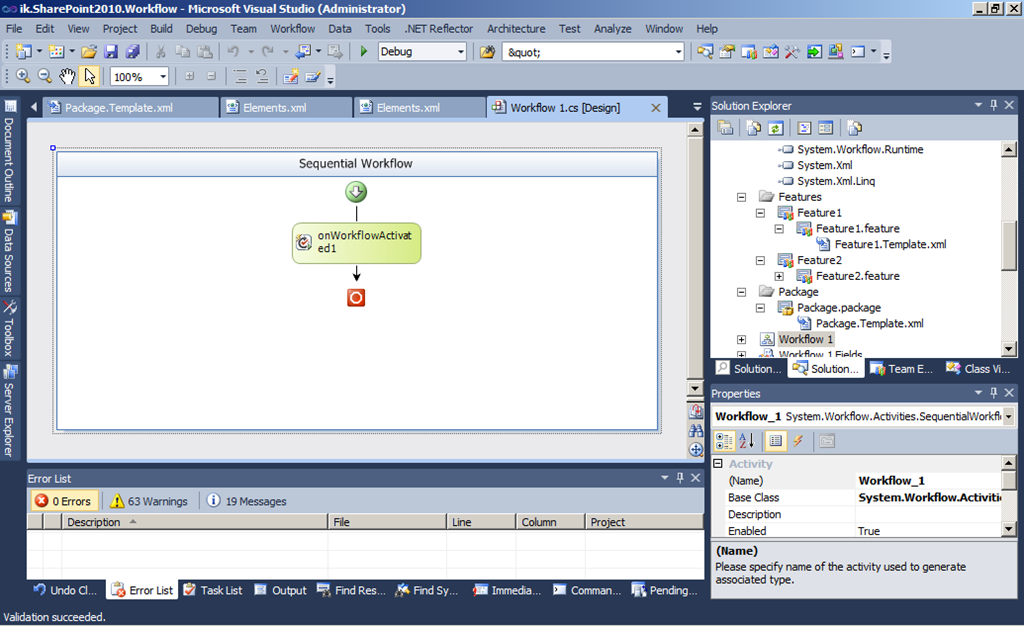
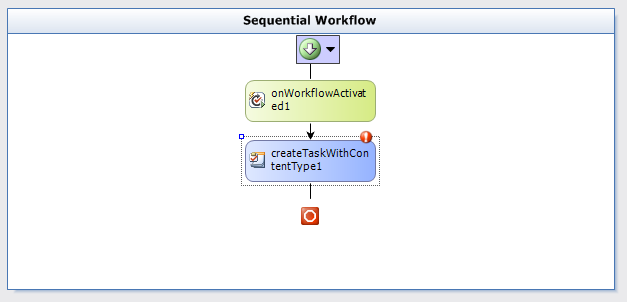
After you did this you get:
Now we need to configure the workflow activity in the “Properties” pane.
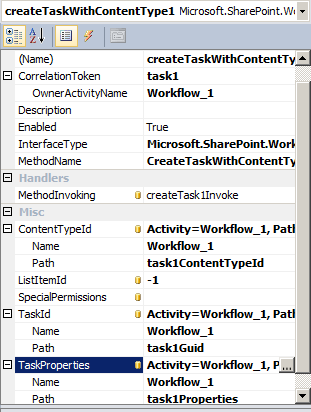
Set “correlationToken” to “task1” and the sub element of “correlationToken” named “OwnerActivityName” to “Workflow_1”.
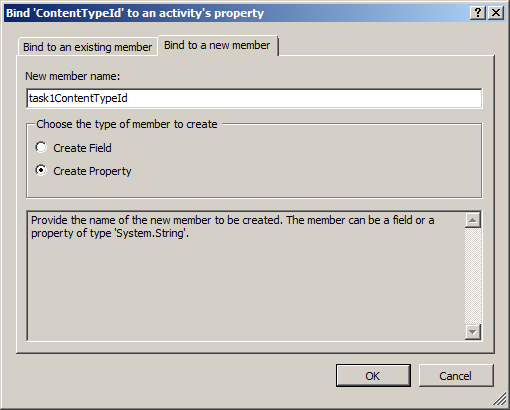
Now we need to create code behind properties for some activity properties. As example I’ll show how to create a code behind property for “ContentTypeId”.
Click on the Button “…” at the activity property edit box:
In the dialog select the tab “Bind to a new member”. Enter the name “New member name” and select the “Create Property” radio button. Press “OK”.
Here are the property bindings you need to create:
“ContentTypeId” = “task1ContentTypeId”
“TaskId” = “task1Guid”
“TaskProperties” = “task1Properties”
In “MethodInvoking” type “createTask1Invoke” and press ENTER. – You’ll be directed to the code editor.
(The activity properties look like this after you finished:
)
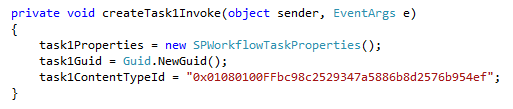
In the method we initialize the task1-Properties we created before. The “ContentTypeId” is taken from the “Schema.xml” file of our “Workflow 1 Tasks” list where we created the Content Type “Workflow 1 Task 1”.
After that your method looks like this:


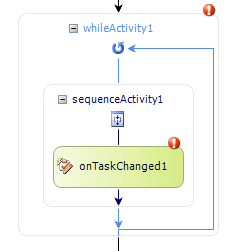
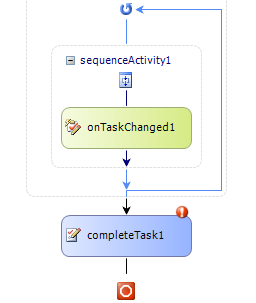
20. Back in the workflow designer. We drag a “While” activity from the Toolbox pane into the workflow behind the “Create Task” activity.
Into the “While” activity we drag a “Sequence” property from the Toolbox pane. We get:
Into the “Sequence” activity we drag a “OnTaskChanged” activity from the Toolbox pane. We get:
Now we edit the properties of the created “OnTaskChanged” activity. We have to set the “CorrelationToken” as described above. Additionally we specify new property bindings:
“AfterProperties” = “task1Changed1_AfterProperties”
“BeforeProperties” = “task1Changed1_BeforeProperties”
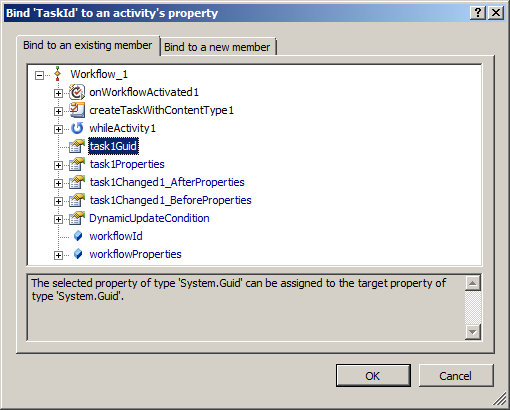
“TaskId” => Bind to the existing member “task1Guid”!!!
In the “Invoked” property add the method name “task1Changed1Invoke”. – The code editor will be opened.
(The activity properties look like this after you finished:
)


21. In the code we add a property at class level:
This property we set inside the “OnWorkflowItemChanged” activity. It will contain the information whether the Workflow Task Item we created before was “Completed” by the assigned user.
In the “task1Changed1Invoke” method we set the “isFinished” property.


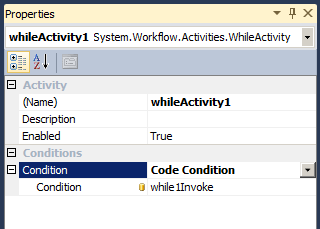
22. Now we need to specify the condition for the “While” activity. In the workflow designer select this activity. In the “Condition” property select “Code Condition” and expand the property. Enter “while1Invoke” in the subproperty with (the same) name “Condition”.
In the code editor enter the code for “while1Invoke” like this:
The “e.Result” property has to be “TRUE” as long as the while loop should run. It should not run anymore (“e.Result = false”) if “isFinished” is TRUE.

23. In the workflow designer add a “CompleteTask” activity behind the “While” activity. Drag the “CompleteTask” activity from the Toolbar pane into the workflow designer. We get:
Select the “completeTask1” activity and edit it’s properties in the Property pane.
Bind “TaskId” to the existing member “task1Guid”
Create a new member namend “task1Outcome” for binding to “TaskOutcome”
Set the “CorrelationToken” to “task1”
24. Whew! 
25. Deploy the project. – It deployed successfully ?! – Congratulations!
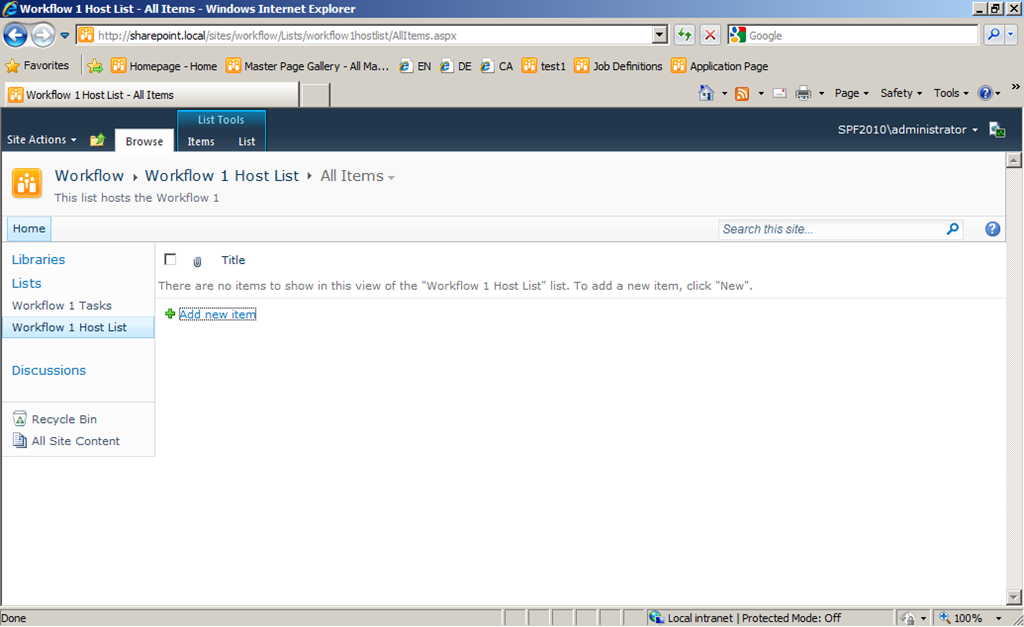
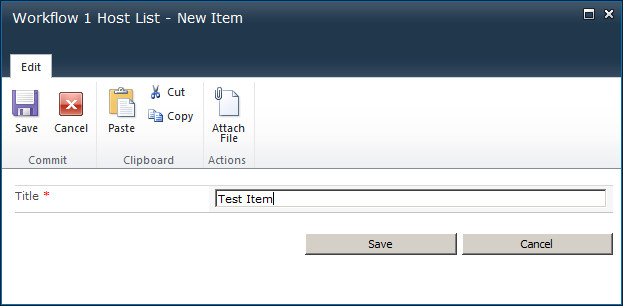
26. Open the browser and navigate to “http://sharepoint.local/sites/workflow”. Open the “Workflow 1 Host List”. Add a new item… – The “Workflow 1” should start automatically.
(After F5 / page refresh:)
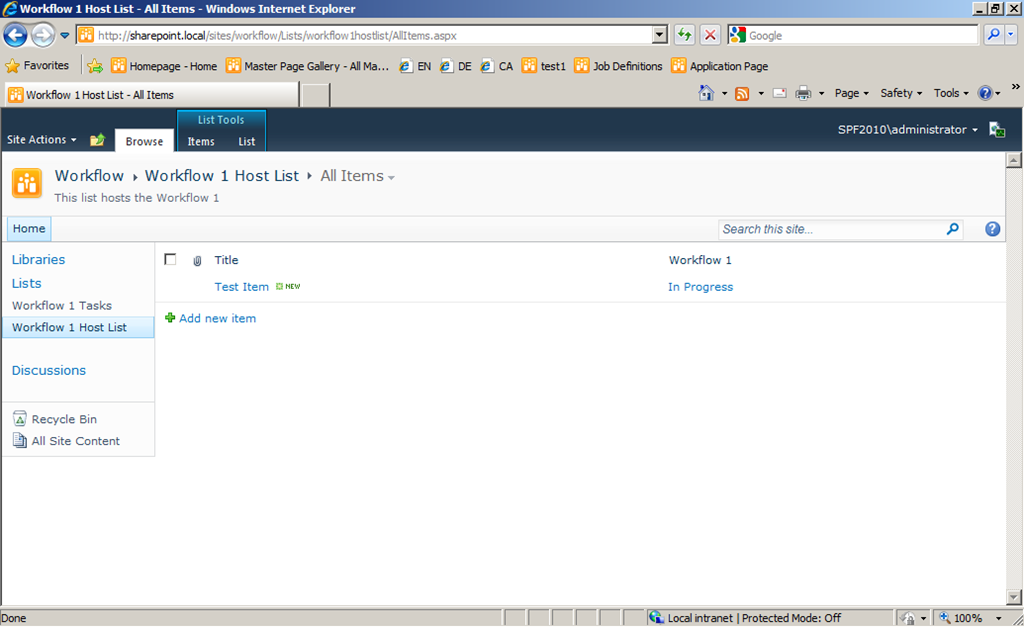
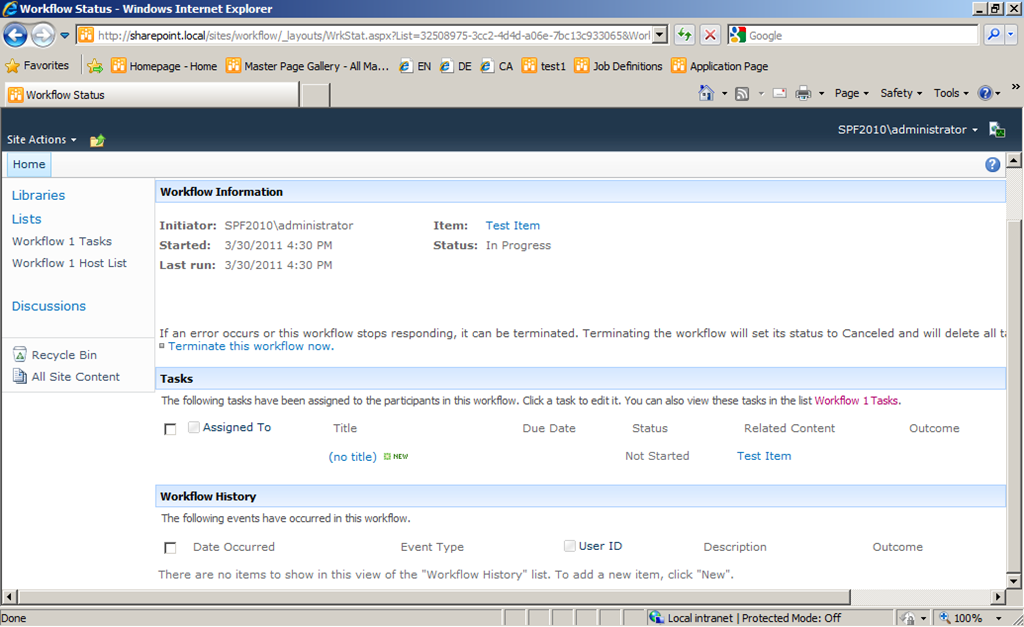
Click “In Process”. We see the Workflow Status page:
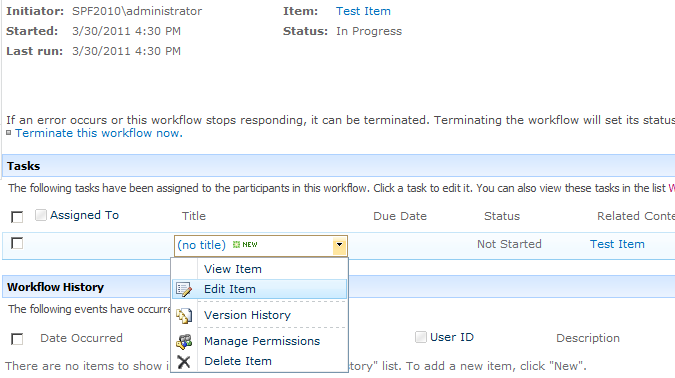
In the “Tasks” section open the context menu of the element “(no title)”. - We did not set a title for the created “Task 1”. This could be done in the method “createTask1Invoke”.
Click “Edit Item”.
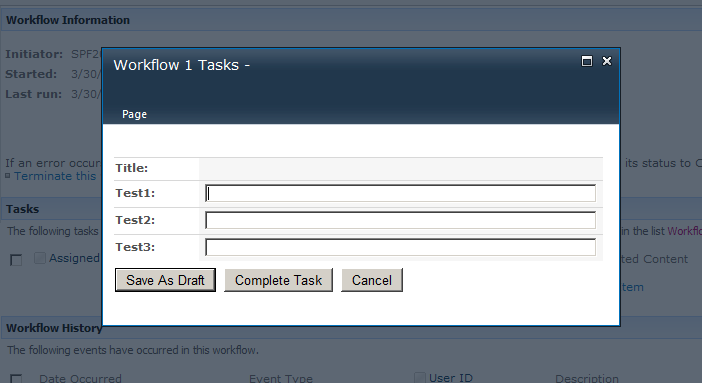
There it is!!! :
Just edit a property and click “Save As Draft”.
On the Workflow Status page you see that the workflow is still running but was modified (“Last run”).
Then edit the task again. Click “Complete Task”.
After that the workflow is “Completed”:


27. We have done it! – Now we could add a “Task 2” for this “Workflow 1” where some other data is requested from users.
With that method you will be able to add custom forms for Workflow Tasks. You could also use forms you create with Silverlight !!!
Thank you for your kind attention!