Walkthrough: Creating a simple Sequential Workflow with a custom Task Form in SharePoint 2010 using Visual Studio 2010 (Part 1 of 2)
In this walkthrough I want to show you how to create a Sequential Workflow with Visual Studio 2010 for use in SharePoint 2010. – I will show how to create a custom Task Form for interaction with users. The Task form will be a native SharePoint list form. No InfoPath. There are many InfoPath samples out there but they cannot be used on a SharePoint Foundation 2010 platform. But workflows can be used on SharePoint Foundation 2010 too!
To reproduce the following steps you need to create a SharePoint site. – In the walkthrough I’ll use a Site Collection located at “http://sharepoint.local/sites/workflow”.
This blog post is part 1 of 2. It describes the steps 1 to 15. Read part 2 here: https://blog.kenaro.com/2011/03/30/walkthrough-creating-a-simple-sequential-workflow-with-a-custom-task-form-in-sharepoint-2010-using-visual-studio-2010-part-2-of-2/
You can download – and help to develop – the whole demo project source code at Codeplex: http://spworkflowdemo.codeplex.com/
(If you need assistance for the deployment process because of deployment errors please see this third post of this series: https://blog.kenaro.com/2011/04/22/walkthrough-creating-a-simple-sequential-workflow-with-a-custom-task-form-in-sharepoint-2010-using-visual-studio-2010-part-3-of-21/)
Let’s start…
1. We create the Site Collection. Use the “Blank Site” site template.

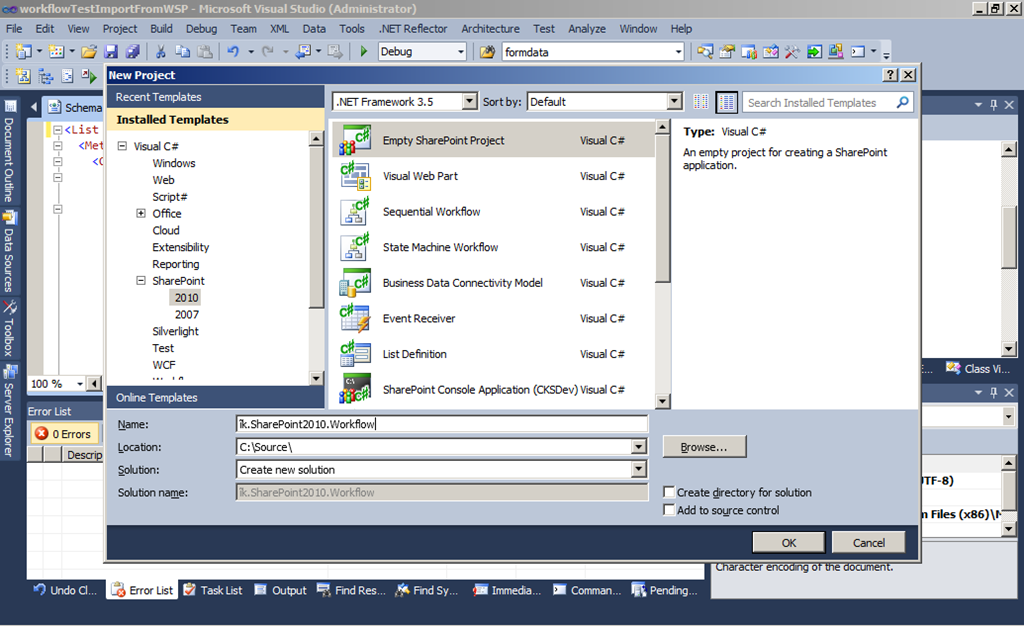
2. In Visual Studio 2010 we create a Empty SharePoint Project. I named it “ik.SharePoint2010.Workflow”
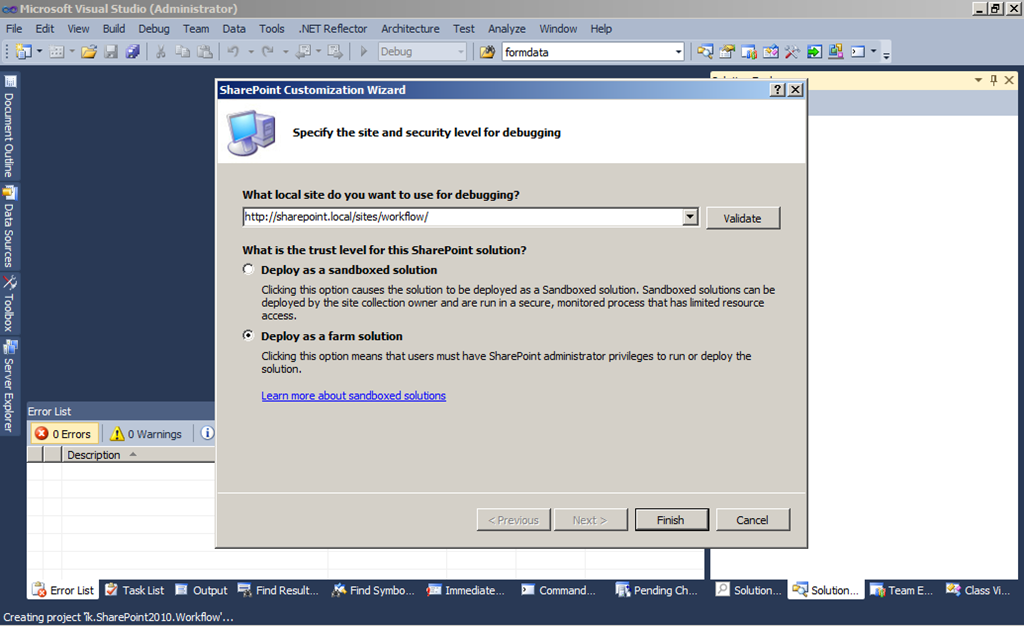
We create it with “Deploy as farm solution” and specify the location “http://sharepoint.local/sites/workflow/”.
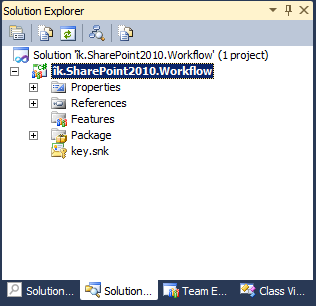
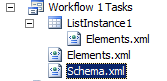
3. This is the project structure at start:
4. First we need to create an instance of the Workflow History list that is needed for the workflow.
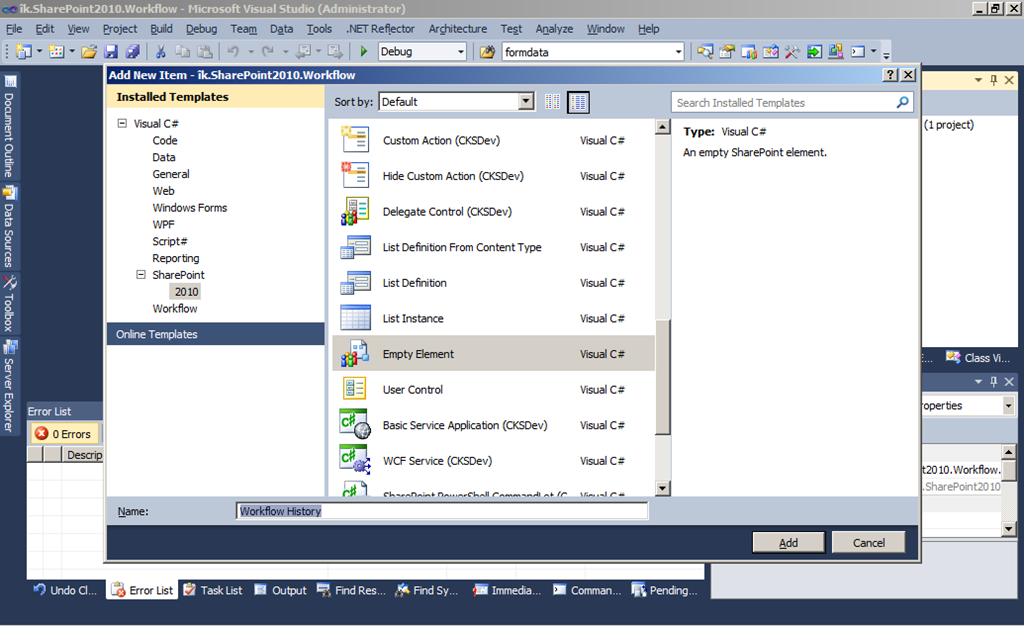
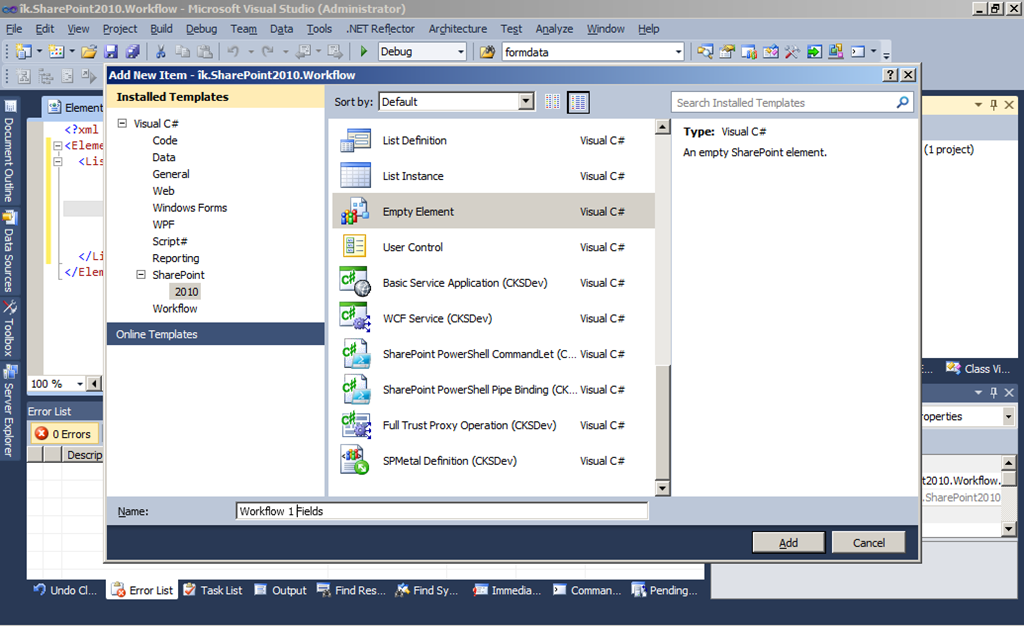
Create a new “Empty Element” project item named “Workflow History”.
Open the created “element.xml” file and modify it as shown below.
1: <?xml version="1.0" encoding="utf-8"?>2: <Elements xmlns="http://schemas.microsoft.com/sharepoint/">3: <ListInstance Title="Workflow History"4: OnQuickLaunch="TRUE"5: TemplateType="140"6: FeatureId="00BFEA71-4EA5-48D4-A4AD-305CF7030140"7: Url="Lists/WorkflowHistory"8: Description="">9: </ListInstance>10: </Elements>The “TemplateType” attribute represents the “Workflow History” list template. It resists on a SharePoint feature with ID “00BFEA71-4EA5-48D4-A4AD-305CF7030140”. It’s a native SharePoint feature.
You can add the attibute “Hidden” to the “ListInstance” tag and set it’s value to “TRUE” to hide the list as it’s done by SharePoint by default for this list. In this case you should also change “OnQuickLaunch” to “FALSE”. For my demo purpose I want to have “Workflow History” visible and on the Quick Launch bar.
5. Now we will create all tools we need for a “Workflow 1”. (May be I’ll create more workflow demos later. So it’s number 1.)
6. We create the SharePoint fields for “Workflow 1”. Therefore we create another “Empty Element” project item named “Workflow 1 Fields”.
I’ll create 3 fields for use in the Task Form we will create: Test1, Test2, Test3. They are all fields of type Text.
1: <?xml version="1.0" encoding="utf-8"?>2: <Elements xmlns="http://schemas.microsoft.com/sharepoint/">3: <!-- Fields for Task 1 of Workflow 1-->4: <Field ID="{2FE15855-3CAB-44A6-AB29-1600204FCA20}" Name="Workflow1Task1_Test1"5: MaxLength="255" DisplayName="Test1" Description=""6: Direction="None" Type="Text" Overwrite="TRUE"7: xmlns="http://schemas.microsoft.com/sharepoint/" />8: <Field ID="{517B22A5-1B89-4C24-82BE-3D4FD99645BC}" Name="Workflow1Task1_Test2"9: MaxLength="255" DisplayName="Test2" Description=""10: Direction="None" Type="Text" Overwrite="TRUE"11: xmlns="http://schemas.microsoft.com/sharepoint/" />12: <Field ID="{3ECFF1FE-F56B-4556-8805-4570D9422FF4}" Name="Workflow1Task1_Test3"13: MaxLength="255" DisplayName="Test3" Description=""14: Direction="None" Type="Text" Overwrite="TRUE"15: xmlns="http://schemas.microsoft.com/sharepoint/" />16: </Elements>
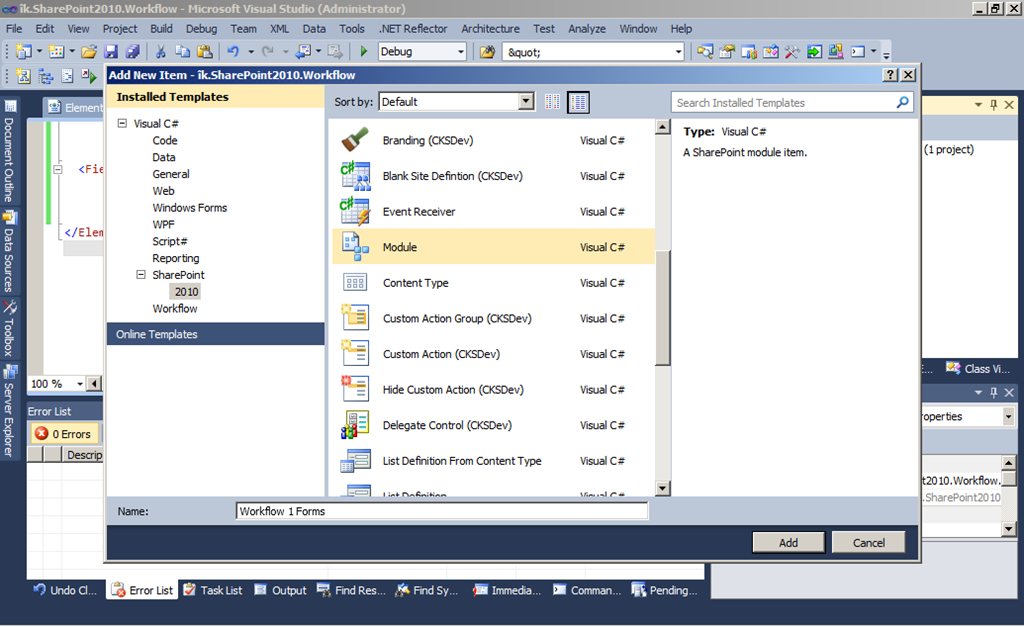
7. Now we create a new “Module” project item named “Workflow 1 Forms”. In this module we will store the Task Form.
Remove the “Sample.txt” file from the created module.
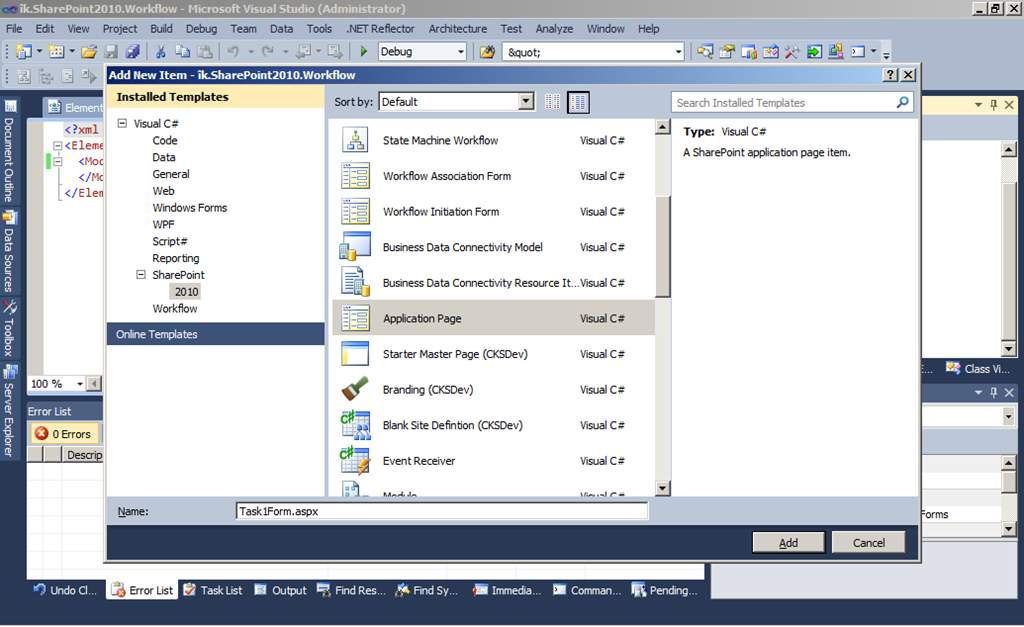
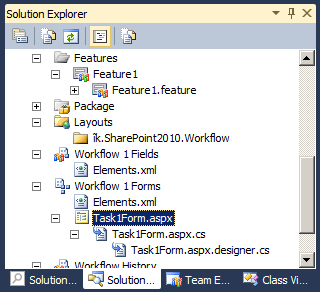
Create a new “Application Page” project item named “Task1Form.aspx”.
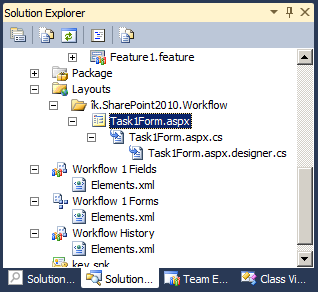
This project item will stored in the folder “Layoutsik.SharePoint2010.Workflow”.
Move the project item “Task1Form.aspx” using Drag & Drop into the module “Workflow 1 Forms”.
Remove the “Layouts” folder from the project. It should be empty.
8. We open “Task1Form.aspx”
First we need to edit the “Page” tag of the ASPX site.
1: <%@ Page Language="C#" AutoEventWireup="true" CodeBehind="Task1Form.aspx.cs" Inherits="ik.SharePoint2010.Workflow.Task1Form" MasterPageFile="~masterurl/default.master" %>Now we insert the following code into the “PlaceHolderMain” content placeholder.
1: <asp:ScriptManagerProxy runat="server" ID="ProxyScriptManager">2: </asp:ScriptManagerProxy>3: <table width="100%" border="0" cellpadding="0" cellspacing="0">4: <tr>5: <td valign="top">6: <table cellspacing="0" cellpadding="4" border="0" width="100%">7: <tr>8: <td class="ms-vb">9: 10: </td>11: </tr>12: </table>13: <table border="0" width="100%">14: <tr>15: <td>16: <table border="0" cellspacing="0" width="100%">17: <tr>18: <td class="ms-formlabel" valign="top" nowrap="true" width="25%">19: <b>Title:</b>20: </td>21: <td class="ms-formbody" valign="top" width="75%">22: <SharePoint:FormField runat="server" ID="ff4" ControlMode="Display" FieldName="Title" /><br />23: </td>24: </tr>25: <tr>26: <td width="25%" class="ms-formlabel">27: <b>Test1:</b>28: </td>29: <td width="75%" class="ms-formbody">30: <SharePoint:FormField runat="server" ID="ff1" ControlMode="Edit" FieldName="Workflow1Task1_Test1" />31: <SharePoint:FieldDescription runat="server" ID="ff1description" FieldName="Workflow1Task1_Test1"32: ControlMode="Edit" />33: </td>34: </tr>35: <tr>36: <td width="25%" class="ms-formlabel">37: <b>Test2:</b>38: </td>39: <td width="75%" class="ms-formbody">40: <SharePoint:FormField runat="server" ID="ff2" ControlMode="Edit" FieldName="Workflow1Task1_Test2" />41: <SharePoint:FieldDescription runat="server" ID="ff2description" FieldName="Workflow1Task1_Test2"42: ControlMode="Edit" />43: </td>44: </tr>45: <tr>46: <td width="25%" class="ms-formlabel">47: <b>Test3:</b>48: </td>49: <td width="75%" class="ms-formbody">50: <SharePoint:FormField runat="server" ID="ff3" ControlMode="Edit" FieldName="Workflow1Task1_Test3" />51: <SharePoint:FieldDescription runat="server" ID="ff3description" FieldName="Workflow1Task1_Test3"52: ControlMode="Edit" />53: </td>54: </tr>55: </table>56: </td>57: </tr>58: </table>59: <table cellspacing="0" cellpadding="4" border="0" width="100%">60: <tr>61: <td nowrap="nowrap" class="ms-vb">62: <asp:Button Text="Save As Draft" runat="server" ID="btnSaveAsDraft" />63: </td>64: <td>65: <asp:Button Text="Complete Task" runat="server" ID="btnComplete" />66: </td>67: <td nowrap="nowrap" class="ms-vb" width="99%">68: <asp:Button Text="Cancel" runat="server" ID="btnCancel" />69: </td>70: </tr>71: </table>72: </td>73: <td width="1%" class="ms-vb" valign="top"> </td>74: </tr>75: </table>76:Now we add some ASP.NET code into the “PlaceHolderPageTitle” content placeholder.
1: <SharePoint:ListFormPageTitle runat="server" />Furthermore we add this lines of code into the “PlaceHolderPageTitleInTitleArea” content placeholder.
1: <span class="die">2: <SharePoint:ListProperty Property="LinkTitle" runat="server" ID="ID_LinkTitle" />3: : </span>4: <SharePoint:ListItemProperty ID="ID_ItemProperty" MaxLength="40" runat="server" />At least we add the following code into the “PlaceHolderAdditionalPageHead” content placeholder.
1: <SharePoint:UIVersionedContent UIVersion="4" runat="server">2: <contenttemplate>3: <SharePoint:CssRegistration Name="forms.css" runat="server"/>4: </contenttemplate>5: </SharePoint:UIVersionedContent>You can see the input fields for the three fields of Task 1. Furthermore you see three buttons. For them we now create some “code behind”.
1: using System;2: using Microsoft.SharePoint;3: using Microsoft.SharePoint.WebControls;4: using Microsoft.SharePoint.Utilities;5:6: namespace ik.SharePoint2010.Workflow7: {8: public partial class Task1Form : WebPartPage9: {10: protected void Page_Load(object sender, EventArgs e)11: {12: btnSaveAsDraft.Click += new EventHandler (btnSaveAsDraft_Click);13: btnComplete.Click += new EventHandler (btnComplete_Click);14: btnCancel.Click += new EventHandler (btnCancel_Click);15: }16:17: void btnCancel_Click(object sender, EventArgs e)18: {19: CloseForm();20: }21:22: private void CloseForm()23: {24: if ( ( SPContext.Current != null ) && SPContext.Current.IsPopUI )25: {26: this.Context.Response.Write("<script>window.frameElement.commitPopup();</script>" );27: this.Context.Response.Flush();28: this.Context.Response.End();29: }30: else31: {32: string str = this.Page.Request.QueryString["Source"];33: if ( ( str != null ) && ( str.Length > 0 ) )34: {35: SPUtility.Redirect(string.Empty, SPRedirectFlags.UseSource, this.Context);36: }37: }38: }39:40: void btnComplete_Click(object sender, EventArgs e)41: {42: SPList l = SPContext.Current.List;43: SPListItem li = SPContext.Current.ListItem;44: li[SPBuiltInFieldId.TaskStatus] = "Tasks_Completed";45: li[SPBuiltInFieldId.PercentComplete] = 1;46:47: SaveButton.SaveItem(SPContext.Current, false, "" );48:49: CloseForm();50: }51:52: void btnSaveAsDraft_Click(object sender, EventArgs e)53: {54: SaveButton.SaveItem(SPContext.Current, false, "" );55:56: CloseForm();57: }58: }59: }We need to modify the “Elements.xml” file of the module named “Workflow 1 Forms”.
1: <?xml version="1.0" encoding="utf-8"?>2: <Elements xmlns="http://schemas.microsoft.com/sharepoint/">3: <Module Name="Workflow 1 Forms" Url="Workflow1Forms" RootWebOnly="FALSE">4: <File Path="Workflow 1 FormsTask1Form.aspx" Url="Task1Form.aspx" />5: </Module>6: </Elements>This specifies there to store the “Task1Form.aspx” file in the site structure.
9. In the next step we create the task list that will contain our workflow tasks.
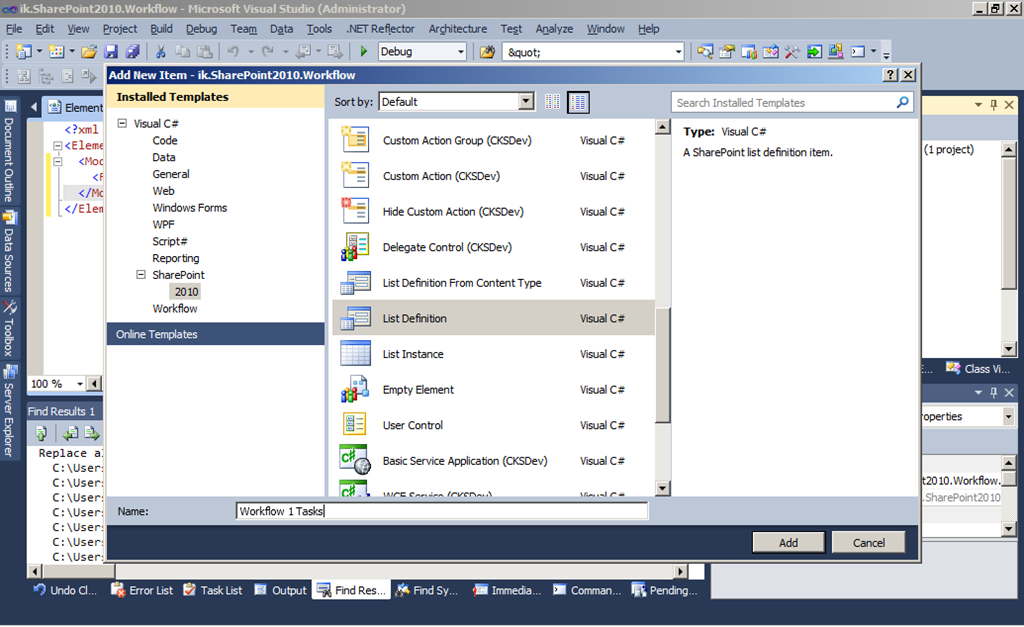
First create a “List Definition” project item named “Workflow 1 Tasks”.
Use “Workflow 1 Tasks” as name of the list definition and “Tasks” as base type. Check “Add a list instance…”.

10. Now open “Elements.xml” of the new list definition project item.
We need to change the identifier of the list type we create! – It **must be “**107”. This is the list template ID for workflow tasks lists in SharePoint. The workflow designer will search for a list with this type inside the site where a new workflow will be created.
Here is the content of “Elements.xml” after our modification:
1: <?xml version="1.0" encoding="utf-8"?>2: <Elements xmlns="http://schemas.microsoft.com/sharepoint/">3: <ListTemplate4: Name="Workflow 1 Tasks"5: Type="107"6: BaseType="0"7: OnQuickLaunch="TRUE"8: SecurityBits="11"9: Sequence="360"10: DisplayName="Workflow 1 Tasks"11: Description="Tasks of Workflow 1"12: Image="/_layouts/images/itgen.png"/>13: </Elements>
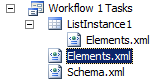
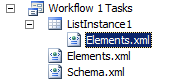
11. Now we modify the “Elements.xml” file of the list instance that will be created during deployment:
Here we also need to modify the type identifier to “107”. Furthermore we change the list url: “Lists/Workflow1Tasks”.
Here is the complete content of “Elements.xml”:
1: <?xml version="1.0" encoding="utf-8"?>2: <Elements xmlns="http://schemas.microsoft.com/sharepoint/">3: <ListInstance Title="Workflow 1 Tasks"4: OnQuickLaunch="TRUE"5: TemplateType="107"6: Url="Lists/Workflow1Tasks"7: Description="Tasks of Workflow 1">8: </ListInstance>9: </Elements>In a “real world” scenario we would prevent the list from being listed on the Quick Launch bar. So the corresponding parameter must be set to “FALSE”.
12. Now we need to modify the “Schema.xml” file of the list definition.
First we set the list type to “107” and configure some other attributes:
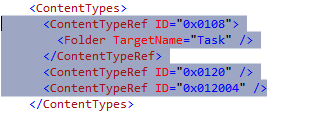
1: <List xmlns:ows="Microsoft SharePoint" Title="Workflow 1 Tasks"2: FolderCreation="FALSE" Direction="$Resources:Direction;"3: EnableContentTypes="TRUE" VersioningEnabled="TRUE"4: Url="Lists/Workflow1Tasks"5: Type="107" BaseType="0"6: xmlns="http://schemas.microsoft.com/sharepoint/">7: […]Now remove the the content types defined in the “ContentTypes” tag in the “schema.xml” file.
Insert this content type definition into the “ContentTypes” tag:
1: <ContentType ID="0x01080100FFbc98c2529347a5886b8d2576b954ef"2: Name="Workflow 1 Tasks 1"3: Group="Workflow 1 Tasks"4: Description="Content Type of Tasks 1 of Workflow 1">5: <FieldRefs>6: <FieldRef ID="{2FE15855-3CAB-44A6-AB29-1600204FCA20}" Name="Workflow1Task1_Test1" DisplayName="Test1" Required="FALSE" Hidden="FALSE" ReadOnly="FALSE" PITarget="" PrimaryPITarget="" PIAttribute="" PrimaryPIAttribute="" Aggregation="" Node="" />7: <FieldRef ID="{517B22A5-1B89-4C24-82BE-3D4FD99645BC}" Name="Workflow1Task1_Test2" DisplayName="Test2" Required="FALSE" Hidden="FALSE" ReadOnly="FALSE" PITarget="" PrimaryPITarget="" PIAttribute="" PrimaryPIAttribute="" Aggregation="" Node="" />8: <FieldRef ID="{3ECFF1FE-F56B-4556-8805-4570D9422FF4}" Name="Workflow1Task1_Test3" DisplayName="Test3" Required="FALSE" Hidden="FALSE" ReadOnly="FALSE" PITarget="" PrimaryPITarget="" PIAttribute="" PrimaryPIAttribute="" Aggregation="" Node="" />9:10: <FieldRef ID="{c042a256-787d-4a6f-8a8a-cf6ab767f12d}" Name="ContentType" />11: <FieldRef ID="{fa564e0f-0c70-4ab9-b863-0177e6ddd247}" Name="Title" Required="TRUE" ShowInNewForm="TRUE" ShowInEditForm="TRUE" />12: <FieldRef ID="{c3a92d97-2b77-4a25-9698-3ab54874bc6f}" Name="Predecessors" />13: <FieldRef ID="{a8eb573e-9e11-481a-a8c9-1104a54b2fbd}" Name="Priority" />14: <FieldRef ID="{c15b34c3-ce7d-490a-b133-3f4de8801b76}" Name="Status" />15: <FieldRef ID="{d2311440-1ed6-46ea-b46d-daa643dc3886}" Name="PercentComplete" />16: <FieldRef ID="{53101f38-dd2e-458c-b245-0c236cc13d1a}" Name="AssignedTo" />17: <FieldRef ID="{7662cd2c-f069-4dba-9e35-082cf976e170}" Name="Body" />18: <FieldRef ID="{64cd368d-2f95-4bfc-a1f9-8d4324ecb007}" Name="StartDate" />19: <FieldRef ID="{cd21b4c2-6841-4f9e-a23a-738a65f99889}" Name="DueDate" />20: <FieldRef ID="{58ddda52-c2a3-4650-9178-3bbc1f6e36da}" Name="WorkflowLink" />21: <FieldRef ID="{16b6952f-3ce6-45e0-8f4e-42dac6e12441}" Name="OffsiteParticipant" />22: <FieldRef ID="{4a799ba5-f449-4796-b43e-aa5186c3c414}" Name="OffsiteParticipantReason" />23: <FieldRef ID="{18e1c6fa-ae37-4102-890a-cfb0974ef494}" Name="WorkflowOutcome" />24: <FieldRef ID="{e506d6ca-c2da-4164-b858-306f1c41c9ec}" Name="WorkflowName" />25: <FieldRef ID="{ae069f25-3ac2-4256-b9c3-15dbc15da0e0}" Name="GUID" />26: <FieldRef ID="{8d96aa48-9dff-46cf-8538-84c747ffa877}" Name="TaskType" />27: <FieldRef ID="{17ca3a22-fdfe-46eb-99b5-9646baed3f16}" Name="FormURN" />28: <FieldRef ID="{78eae64a-f5f2-49af-b416-3247b76f46a1}" Name="FormData" />29: <FieldRef ID="{8cbb9252-1035-4156-9c35-f54e9056c65a}" Name="EmailBody" />30: <FieldRef ID="{47f68c3b-8930-406f-bde2-4a8c669ee87c}" Name="HasCustomEmailBody" />31: <FieldRef ID="{cb2413f2-7de9-4afc-8587-1ca3f563f624}" Name="SendEmailNotification" />32: <FieldRef ID="{4d2444c2-0e97-476c-a2a3-e9e4a9c73009}" Name="PendingModTime" />33: <FieldRef ID="{35363960-d998-4aad-b7e8-058dfe2c669e}" Name="Completed" />34: <FieldRef ID="{1bfee788-69b7-4765-b109-d4d9c31d1ac1}" Name="WorkflowListId" />35: <FieldRef ID="{8e234c69-02b0-42d9-8046-d5f49bf0174f}" Name="WorkflowItemId" />36: <FieldRef ID="{1c5518e2-1e99-49fe-bfc6-1a8de3ba16e2}" Name="ExtendedProperties" />37: </FieldRefs>38: <XmlDocuments>39: <XmlDocument NamespaceURI="http://schemas.microsoft.com/sharepoint/v3/contenttype/forms">40: <FormTemplates xmlns="http://schemas.microsoft.com/sharepoint/v3/contenttype/forms">41: <Display>ListForm</Display>42: <Edit>ListForm</Edit>43: <New>ListForm</New>44: </FormTemplates>45: </XmlDocument>46: <XmlDocument NamespaceURI="http://schemas.microsoft.com/sharepoint/v3/contenttype/forms/url">47: <FormUrls xmlns="http://schemas.microsoft.com/sharepoint/v3/contenttype/forms/url">48: <Edit>Workflow1Forms/Task1Form.aspx</Edit>49: </FormUrls>50: </XmlDocument>51: </XmlDocuments>52: </ContentType>53:54:You see the “FormUrls” tag? Inside this tag we specify our custom form template we created before.
The new content type is derived from the “Workflow Task” content type 0x010801. – In the “FieldRefs” section we add our fields we need inside the workflow.
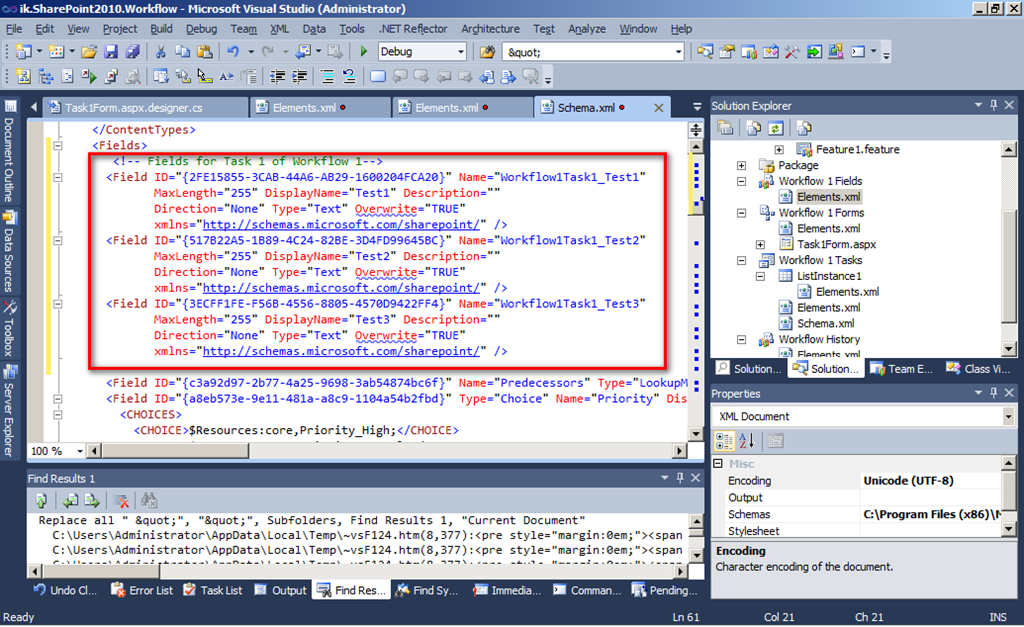
13. Now we need to add the field definitions of our custom fields to the “Schema.xml”. Copy them from the “Elements.xml” file of project item “Workflow 1 Fields” into the “Fields” tag of “Schema.xml”:
Furthermore you need to add a field definition for the field “Completed”:
1: <Field ID="{35363960-D998-4aad-B7E8-058DFE2C669E}" Name="Completed"2: SourceID="http://schemas.microsoft.com/sharepoint/v3"3: StaticName="Completed" Group="Base Columns" Type="Boolean"4: DisplayName="Completed" Hidden="TRUE" Sealed="TRUE"5: Overwrite="TRUE" xmlns="http://schemas.microsoft.com/sharepoint/">6: <Default>FALSE</Default>7: </Field>
14. Now deploy the project.
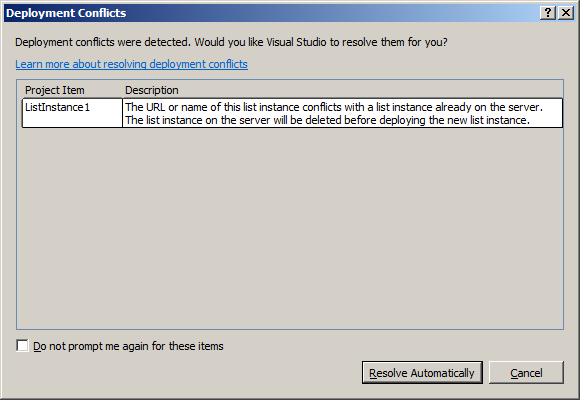
While deployment you may get this dialog:
Check “Do not prompt…”. Press “Resolve Automatically” - it’s your only option
.
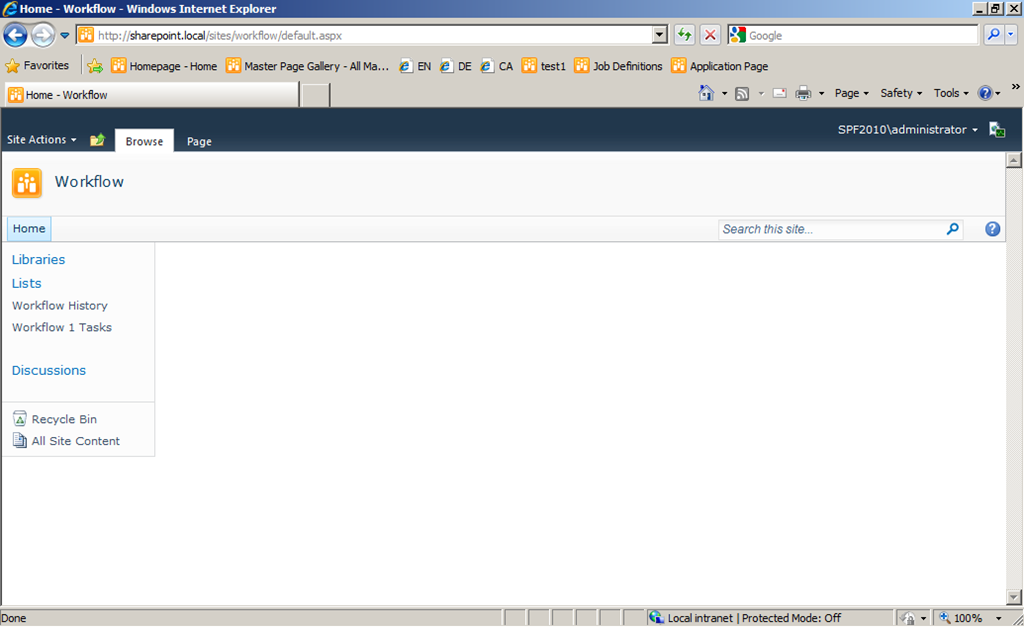
15. Have a look into the site using the browser. – We will test our “Edit” form. Remember that we did not specify special “New” form or “Display” form. This you could do the same way as you created the “Edit” form.
We see our lists in the Quick Launch.
Open the “Workflow 1 Tasks” list. On the Ribbon open the “Items” tab. We see our Content Type in the New Item submenu:
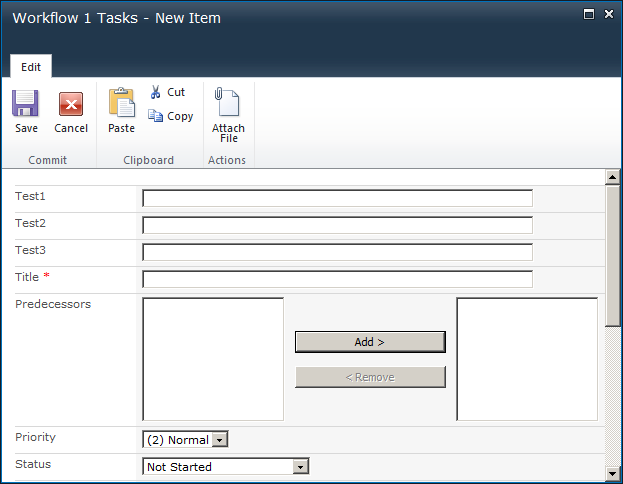
Create an item of this type. You see a standard “New” form and on it you see our three “Test” fields:
Enter some data and press “Save”.
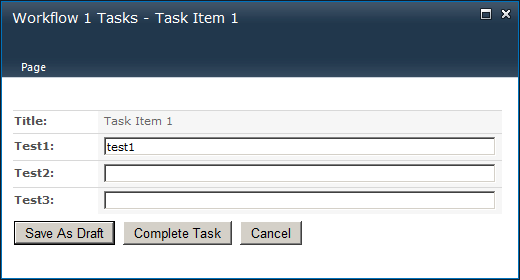
Open the item in “Edit” form. Now you should see our custom list form.
If you click “Save As Draft” your changes will be stored in the task item. If you click “Complete Task” two item fields will be changed in addition to the changes made in the form: It sets “Status” to “Tasks_Completed” and ”% Complete” to “100”. You can see this in the Code Behind file of the list form.
Test all buttons.
After “Complete Task”:
You see: “% Complete” is set to “100 %”.
So far our projects works as expected.


See Part 2 for the next steps… There I will show you how to create a simple Sequential Workflow that uses our Task Form.